
That recent thrift shop fashion shoot I mentioned? Here's what it was like.

Emma, thrift store fashion :: Hair Plus Salon and Michael Gowin Photography, Lincoln, IL
Look Great on the Cheap -- Thrift Store Fashion Shoot :: Hair Plus Salon and Michael Gowin Photography, Lincoln, IL
Want to look good but only have a few bucks?
Two words: thrift stores.
Diana Pickett, owner of Hair Plus Salon here in Lincoln, and I wanted to find out how much you could get for how little, so we set up a "thrift store fashion shoot." We sent four models out to some thrift stores in Lincoln, then to Diana's salon for hair and makeup, and finally to the studio for photographs. Emma is pictured above in an outfit that cost just a couple dollars.
If you click over to the New Herald News, there's a story and more photos from the session there.
Check back here soon--I'll have a behind-the-scenes video so you can see what the photo shoot was like.
Many thanks to Diana, her assistant Nichole, and our other models: Hannah, Emma, and Sheralyn.

Nicole, vintage Hollywood portrait :: Michael Gowin Photography, Lincoln, IL
Vintage Hollywood-style Portraits with Nicole and the ALZO Pan-L-Lites :: Springfield, Illinois, Portrait Photographer
Some time ago I'd checked out a book on vintage Hollywood portraits from the library. In its pages were scores of photographs of Hollywood legends like James Cagney, Rita Hayworth, John Wayne, Cary Grant, Clark Gable, Greta Garbo, and a host of others.
The book also contained lighting diagrams for the pictures and the stories behind the portraits, as well as details about the equally famous photographers who made many of these iconic images: names like George Hurrell, C.S. Bull, and Robert Coburn.
There's something enchanting about those classic images--the gorgeous black & white prints, the soft focus, the mastery of light and composition. I've wanted to experiment with that style for some time. Nicole, whose senior portraits I made this fall, joined me at the studio today to see what we could do.
Since those old Hollywood portraits used continuous lights (although they were "hot" lights), I also wanted to use continuous lights for these tests. So I used the ALZO Video Pan-L-Lites that I reviewed about the other day. While I wasn't able to duplicate the quality of light exactly as it appeared in the old portraits, the Pan-L-Lites still gave me credible light. By using the grids and barn doors on the Pan-L-Lites, I was able to shape the light for several good looks, including the ones in the images posted here.
There's still a lot for me to learn about this style but this was a fun first step. Many thanks to Nicole for her patience and time today.

Nicole, vintage Hollywood portrait :: Michael Gowin Photography, Lincoln, IL

Nicole, vintage Hollywood portrait :: Michael Gowin Photography, Lincoln, IL
ALZO Video Pan-L-Lite Review :: Bloomington, Peoria, Springfield Hybrid Portrait and Commercial Photographer/Videographer
Hybrid photographers who shoot still photographs, video, and audio are pushing into new imaging territory and need new tools to help them on that journey. Light, of course, is the primary tool we use to create our work.
In addition to the Einstein strobes I use for still photography, I've been using the ALZO Video Pan-L-Lites for both still and motion projects. These fluorescent lights are intended to give a flicker-free, color-accurate quality of light for photographers and videographers.
How do they rate? Check out the video above to see what I've concluded after having used them for a few months in the studio. The review runs 23 minutes, so you may want to grab a beverage and a snack before settling in.
If you're considering the ALZO Pan-L-Lites for your studio, make sure you check out the samples videos on their site.
Have questions or comments? Drop them in the comments section below the post and I'd be happy to respond.

A good data backup strategy will save you lots of time and trouble - Michael Gowin Photography, Lincoln, IL
The Glamorous Side of Small Business: Data Maintenance :: Michael Gowin Photography, Lincoln, IL
UPDATED June 2015
Our computers hold a lot of valuable stuff: precious photographs and videos, thousands of music files, important financial records, not to mention data for work and projects.
Just like death and taxes, however, a computer hard drive failure is never a question of if: it's when.
Even though your car has a "check engine" light, your computer doesn't—hard drive crashes often come suddenly and unexpectedly.
In the past 15 years, I've had two instances of hard drive crashes on my main laptop.
The first time it happened, I wasn't prepared with a good backup strategy (way back in the 90s) and lost six months of work.
Ouch.
That was a painful lesson and it taught me an important principle about the fragility of digital data:
Digital data doesn't exist unless it's in at least two places.
The second time it happened—just a few years ago—I was prepared.
I had backed up my primary hard drive regularly and lost only a couple weeks of work. Instead of being catastrophic, the episode was merely an annoyance and I was back on my feet quickly.
Since starting my photography business in 2006, I've had a consistent data maintenance plan and haven't lost a file yet. I've refined the process over the years and spent a few hours this weekend tidying up for 2013. I thought it might be helpful for you to see how I handle data for client projects.
After an assignment, client photographs are copied from the camera memory cards to a project folder on the computer. Once in the computer, the images are cataloged and renamed in Adobe Lightroom.
The project folder is copied to an external RAID. A "RAID" is a redundant array of independent disks--basically a fancy way of saying that the data is spread across several hard drives so that, if one disk fails, the data is still recoverable. I use a Drobo to store all of my client projects in my office at home.
The project folders are then copied to a second external drive. Although the Drobo is a great storage solution, it's still in my house. And if the house caught fire, the Drobo would be gone. So the Drobo gets backed up on additional external drives with Carbon Copy Cloner, and these drives are kept at the studio.
Finished client files are stored in the cloud. After I've finished working on a project and delivered the prints, products, or files to the client, the completed files are stored online in my Zenfolio account.
Once I'm done working on a project, the folder is deleted from my computer only after all of the backups have been updated. The folder is once again copied to the Drobo, which is then backed up to the studio backup drives, and any additional finished files are uploaded to Zenfolio. The data is now in three places: my home office Drobo, the studio external drives, and online.
Important non-photo working documents are stored online. Services like Google Drive and Dropbox help ensure that important documents are constantly and instantly accessible.
The primary laptop hard drive gets backed up at least twice/month. I use Carbon Copy Cloner to make a "clone" of the laptop hard drive on an external drive. If the computer's internal drive fails, I can plug in the external drive and I'm ready to go.
This may seem like an expensive "belt and suspenders" approach but, again, I've yet to lose a client's photographs. And some day, one of those drives will fail—it's only a matter of time. When that happens, I've got two other places to get that important data.
If you have valuable files at home or your office, make sure you have a good data maintenance plan. At a bare minimum, back up your data regularly—even if you keep the additional drive at home or the office. For Mac users, Apple's Time Machine software makes this a simple and painless process: just get an external drive, plug it into your computer, and fire up Time Machine. Carbon Copy Cloner is also a solid solution.
Start 2014 with a good data maintenance plan to keep your stuff safe—you'll be glad you did.
Behind the Session -- A Look at the Headshot Video :: Bloomington, Springfield, Peoria, Illinois, Business Portrait Photographer
A couple weeks ago I posted the video below. I wanted to compare the differences between the kinds of photographs that many people use for business portraits (AKA headshots) and social media profile images. Lots of folks simply take self-portraits (you may know them as "selfies") with their cell phones or ask a friend to do the same. Or maybe they or a friend have a nice camera, so they'll use that. Others hire a photographer to make their portrait.
In this post, I want to take you behind the scenes and talk about each of the images and why I chose to present them the way I did.
Let's start with the selfies.

Karisa - "selfie" with iPhone 5

Hannah - "selfie" with iPhone 5
The selfie makes for a common profile picture: it's quick, easy, and free. A lot of selfies are taken in bathroom mirrors and the driver's seats of cars. Many show cluttered backgrounds--which is one of the things you're trying to avoid in a business portrait.
For the three types of photos Hannah and Karisa made of themselves, I gave them the advantage of photographing against a white background. A plain, neutral colored wall would serve the same purpose. They also used the incandescent ceiling lights as the source of illumination since most self-made photographs will be made with whatever light is available.
Next, Karisa and Hannah took one another's photographs with the cell phone.

Karisa - taken with iPhone 5

Hannah - taken with iPhone 5
Not much difference between the two images. The camera on the back of the phone has a higher resolution sensor than the camera on the front (the "selfie" camera), but the lighting is still the same so there's little improvement.
We moved on to the Really Nice Camera.

Karisa - taken with Panasonic GH3 and Lumix 12-35mm f/2.8 lens

Hannah - taken with Panasonic GH3 and Lumix 12-35mm f/2.8 lens
For these couple of images, I let the girls use one of my cameras, the Panasonic GH3 with the Lumix 12-35 f/2.8 lens. This camera/lens combination currently runs about $2,000. Conventional wisdom suggests that if you have a "really nice camera," you should be able to take a really nice picture, right?
Again, however, the results really don't look much different. A business portrait or headshot is usually made with a short telephoto lens, an equivalent focal length of 85mm or longer. This lens has an equivalent focal length of 24-70mm, a common mid-range zoom. So why did I give the girls this lens? This is what most people would have if they own a Canon or Nikon DSLR. And, interestingly, the girls made the picture at the wide end (24mm) of the lens--not a flattering look for a portrait.
Just because you own a hammer doesn't mean you can build a house. I do and I can't.
And the light is still lousy. Not their fault; it's what they had to work with.
Lastly, let's look at the professional pictures.

Karisa - photographed by Michael Gowin with Panasonic GH3, Olympus 45mm f/1.8 lens, and Alzo Digital Pan-L-Lite

Hannah - photographed by Michael Gowin with Panasonic GH3, Olympus 45mm f/1.8 lens, and Alzo Digital Pan-L-Lite
Starting around 2:56 in the video, you'll see that I take over. I have a light set up (because good photographs are made in good light) and I start by showing Karisa where I'll want her to sit. Then I use a light meter to measure the light and set a proper exposure on the camera. Before I begin photographing Karisa, I explain what I'm going to do, letting her know I'll be photographing her from the head and shoulders. I take a few test shots, check exposure again, then start.
By using my hand and tilting my head, I give her direction and talk her through how I want her to position her body and head as well as change expression. We pause to chat and laugh--I want her to feel relaxed because she'll photograph better if she's relaxed. When I feel like we've got some good frames, Karisa steps out, Hannah takes a seat, and we repeat the process.
The color of my photographs is much more natural/accurate because they've been properly white balanced. The cell phone and the automatic white balance in the camera on the third round of pictures don't do well with incandescent light. I also used a short telephoto lens--90mm--for my portraits. It's the lens I use on almost every business portrait session in the studio.
So that's what we did and how we did it. Which one would you choose for your profile photo?
Questions? Feel free to ask in the comments below.
Learn more about what's involved in a business portrait session, including my recommendations for preparing for your session and an exclusive behind-the-scenes looks with Bloomington, Illinois, businesswoman Andrea Flairty.
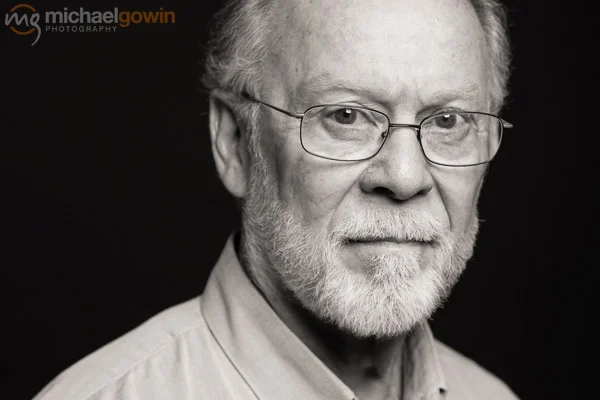
David Alexander, stained glass artist, Lincoln, Illinois :: Michael Gowin Photography
David Alexander, Portrait of the Artist :: Lincoln, Illinois, Business Photographer
David Alexander is an interesting and talented man.
An architect by training, David has now for many years managed a real estate business with his wife, Sonnie. David is also a juried artist who creates stained glass pieces. If you've been in the Regions Bank building in Lincoln, you've seen David's work. He was recently commissioned to create an installation for Abraham Lincoln Memorial Hospital--you'll see it when you step off the elevator onto the second floor. It fills the windows that overlook the roof.
David and I recently talked about making some new portraits and he came by the studio last week to do that.
He'd had a business headshot done several years ago but wanted to update it with an image that would be more characteristic of an artist than a real estate broker. While I often photograph business portraits on a pure white background, I wanted to aim for a more subtle or sensitive look in David's new portraits. That influenced the background, light, and composition choices, not to mention David's expression.
The image above was David's favorite; I also liked the one below.

David Alexander, stained glass artist, Lincoln, Illinois :: Michael Gowin Photography
The image at the top features a dark gray background and David is lit with a Paul Buff Einstein in a "beauty dish," positioned just above him and slightly to the right. A beauty dish* (or, as we called it that day, a manly dish) looks like a 22" diameter salad bowl and it provides a very flattering quality of light--somewhere between a hard and soft look when it's moved in close.
The second image is lit with a Paul Buff Einstein in a 60" Photek Softlighter II. As you can see, that larger light source has a much softer, open quality, similar to a large window. The lighter background further emphasizes the openness of the image.
David was very pleased with his photographs, and it was an enjoyable process working with another creative to make them.
*Many thanks to Jim Grimaldi for letting me borrow his beauty/manly dish.